How to create, enter and modify a subcircuit ?
This python script example helps to understand how to create a subcircuit but also enter and modify a parameter value into it.
To illustrate this script, two resistors will be encapsulated into a subcircuit called Sub_module.
Subcircuit creation is useful for building complex and personalized models.
SIMBA circuit
Below the simple circuit designed inside SIMBA Desktop.

A simple DC analysis is performed to measure the output voltage accross the load resistor R_2.
Python Script
The Python script used for showing the subcircuit creation/modification will do the following tasks:
- import all the necessary libraries
- load the circuit subcircuit.jsimba
- duplicate the existing design1 from this circuit and name it Design 2 with subcircuit
- define and create the subcircuit which encapsulates both resistors R_1 and R_2
- rename the subcircuit such as Sub_module
- Enter (access) into Sub_module, modify the value of R2 and save project
- run the simulation for both design1 and Design 2 with subcircuit
- retrieve the output voltage for both simulation
- plot the output voltage for each value of R_2 defined into the design1 (without subcircuit) and Design 2 with subcircuit
Conclusion
Below the result of the output voltage once the simulation is over through the Python script:
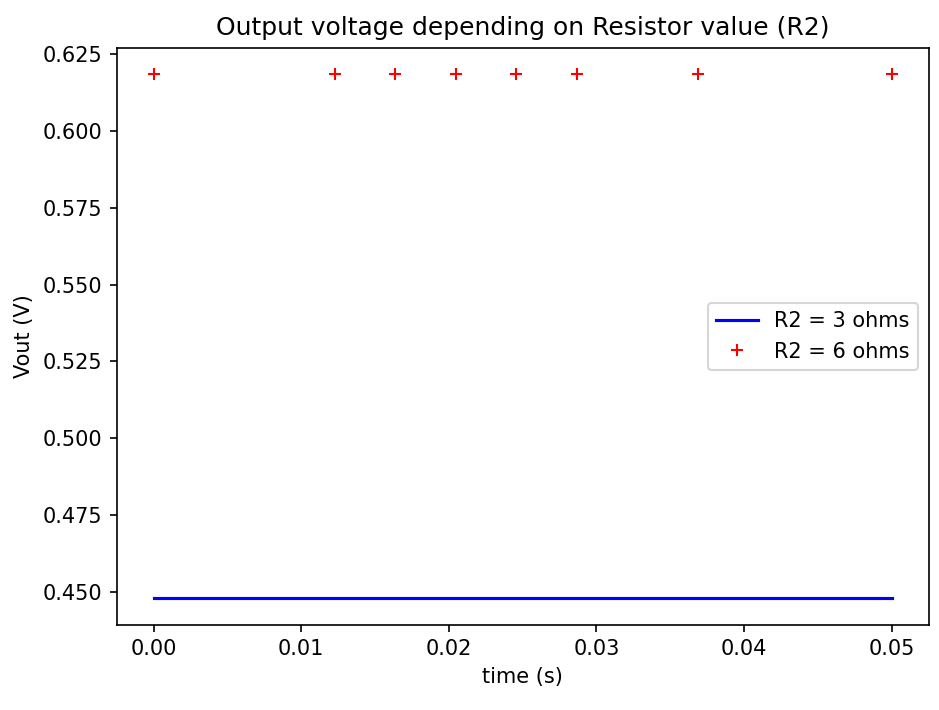
The red curve corresponds to the output voltage with R2 defined into the subcircuit (design2) rather than the blue one which is linked to R2 without the subcircuit (design1)
It is important to say that the project can be reloaded into SIMBA Desktop GUI in order to observe the design2 "Design 2 with subcircuit" and the Design 1 (without subcircuit). Of course the python scripts needs to be run first.