Creating Subcircuits and Custom Libraries
This tutorial explores the creation of subcircuits and custom libraries.
This feature can help you organize your circuit:
- for example, to separate your control circuit diagram from your power circuit diagram,
- or to repeat an identical part of your circuit.
How to create and modify a subcircuit
To describe this feature, the example of a single-phase controlled rectifier is considered. A subcircuit for controlling the ignition delay angle will be created.
✔ Step 1: Select the part of your schematic that you want to include in your subcircuit, and click on subcircuit: this automatically creates a subcircuit component.
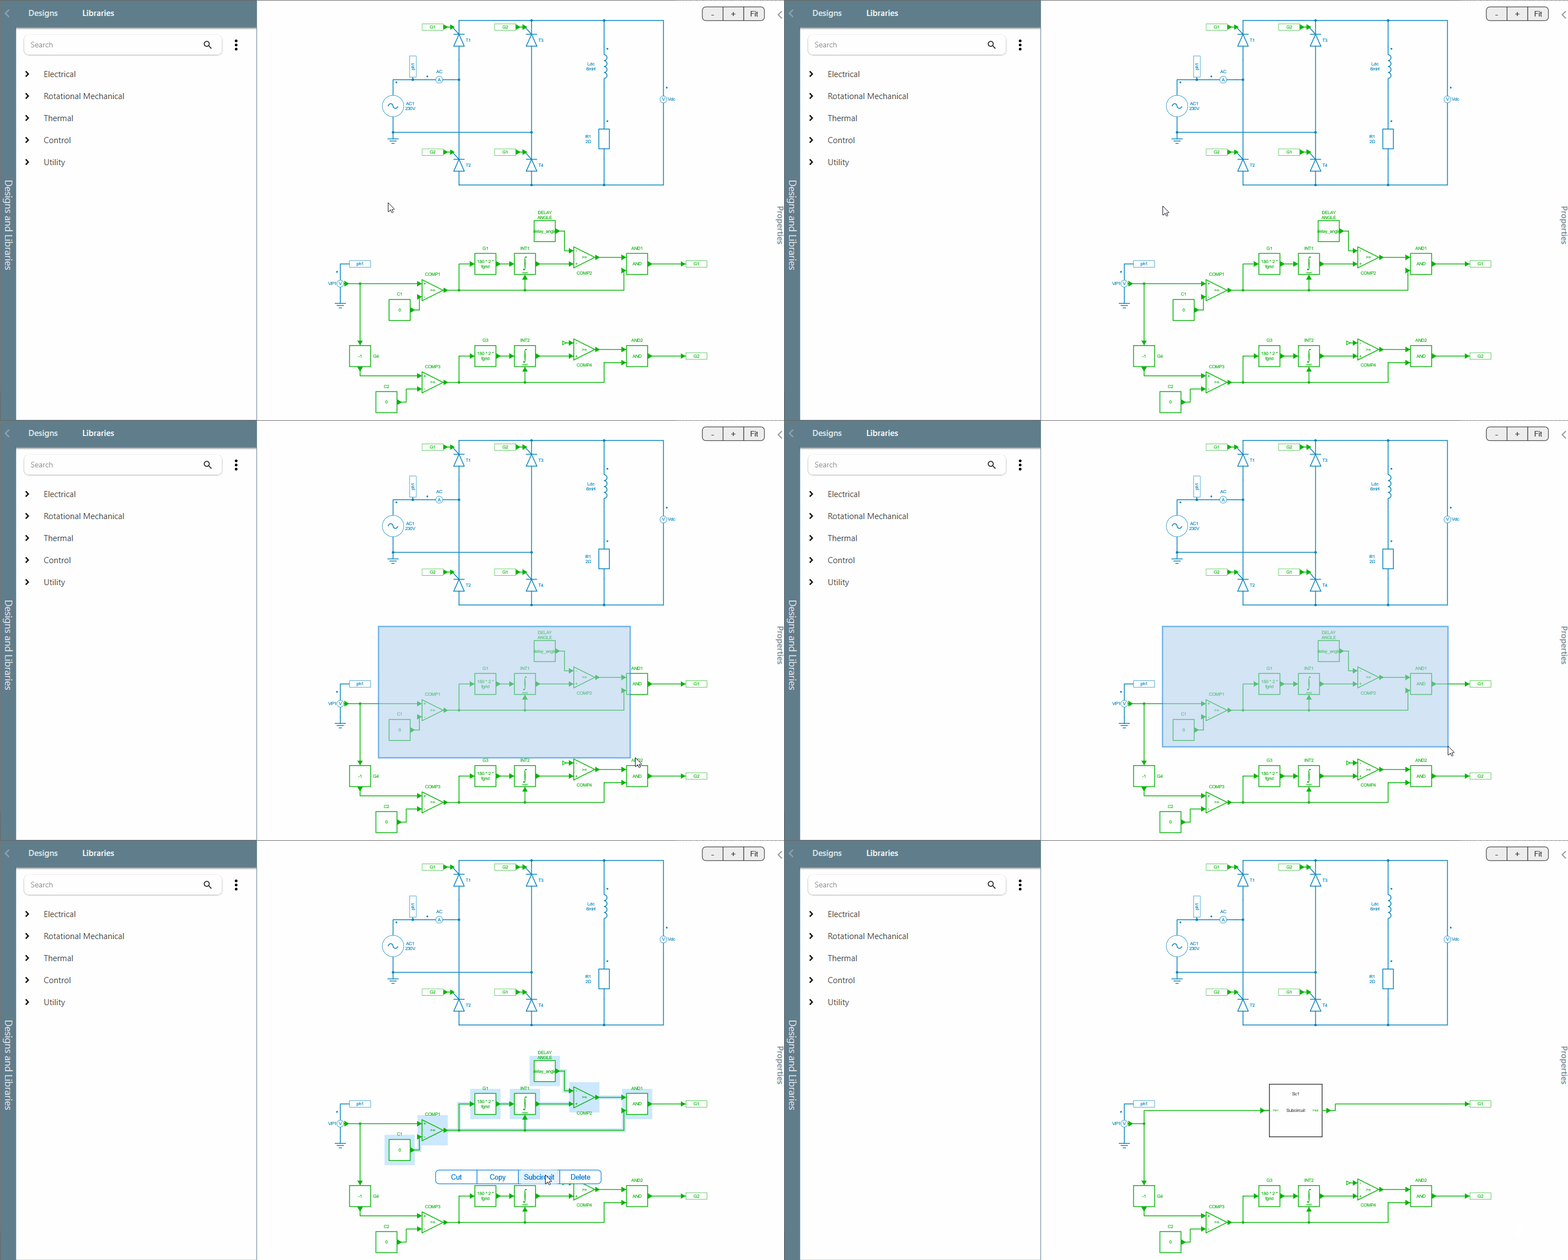
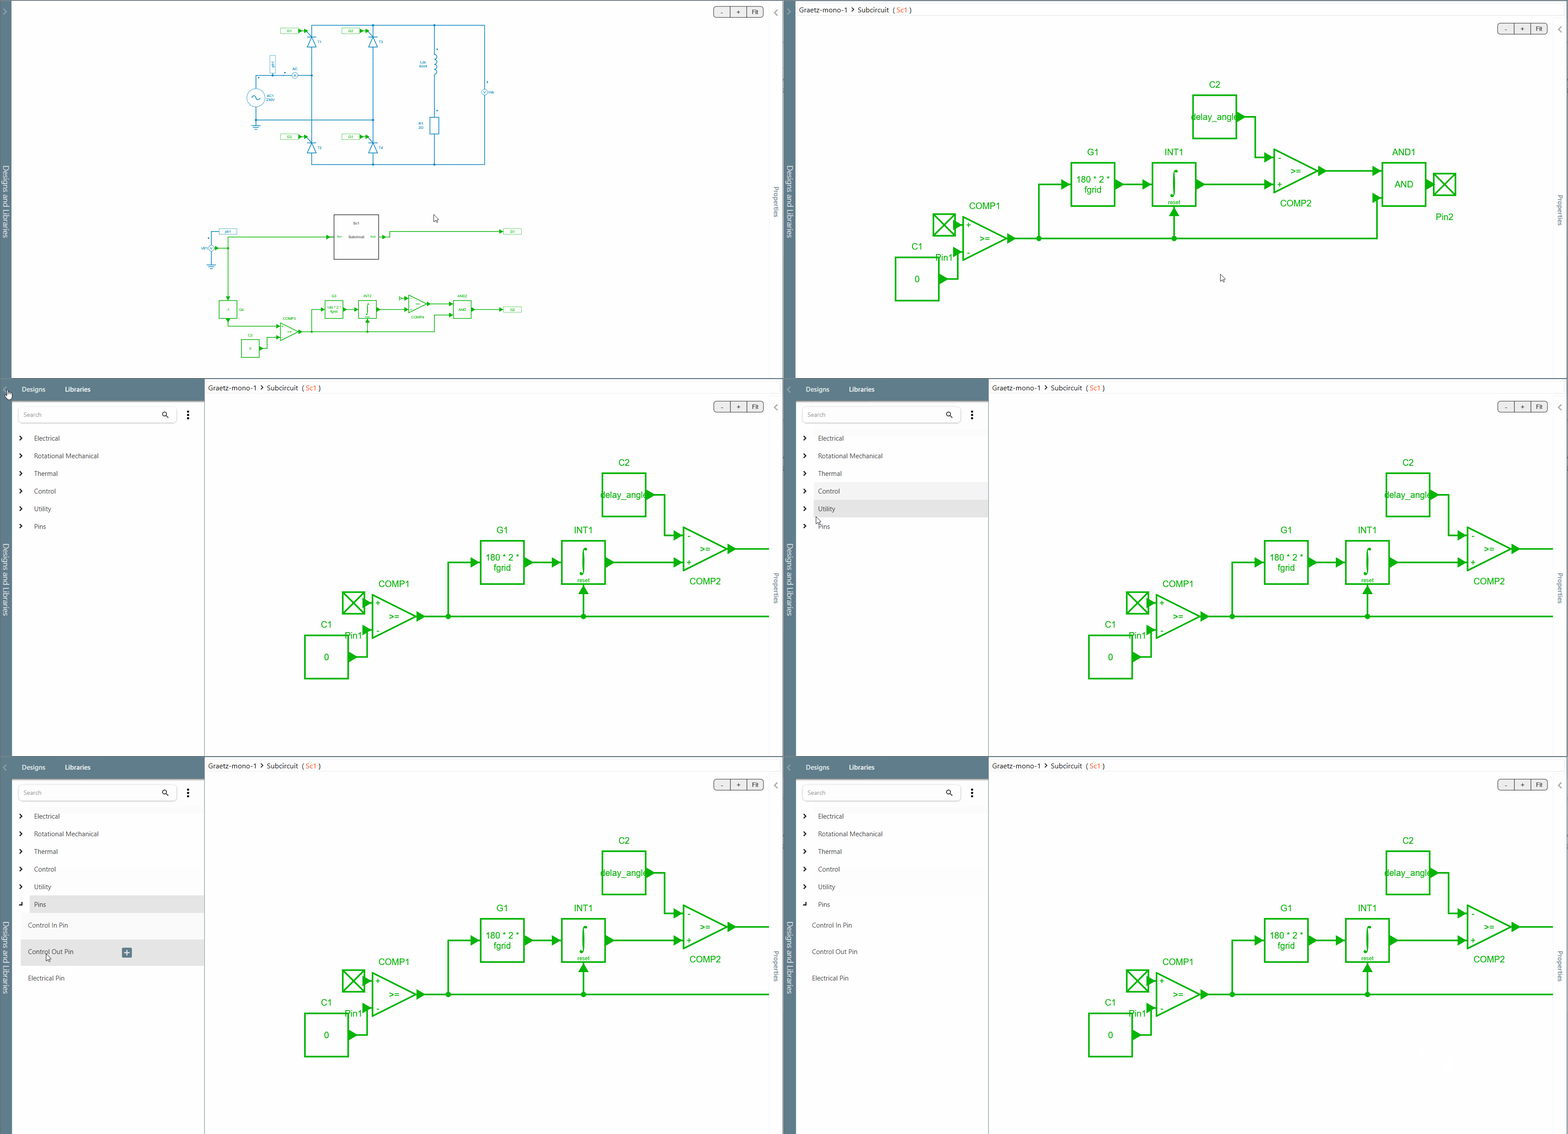
✔ Step 2: To enter this component, just select it and click on open to view the delay control diagram.
If you want to add an input or output pin, go to the library panel and you can notice that you have a new library with all the necessary pins for subcircuits.
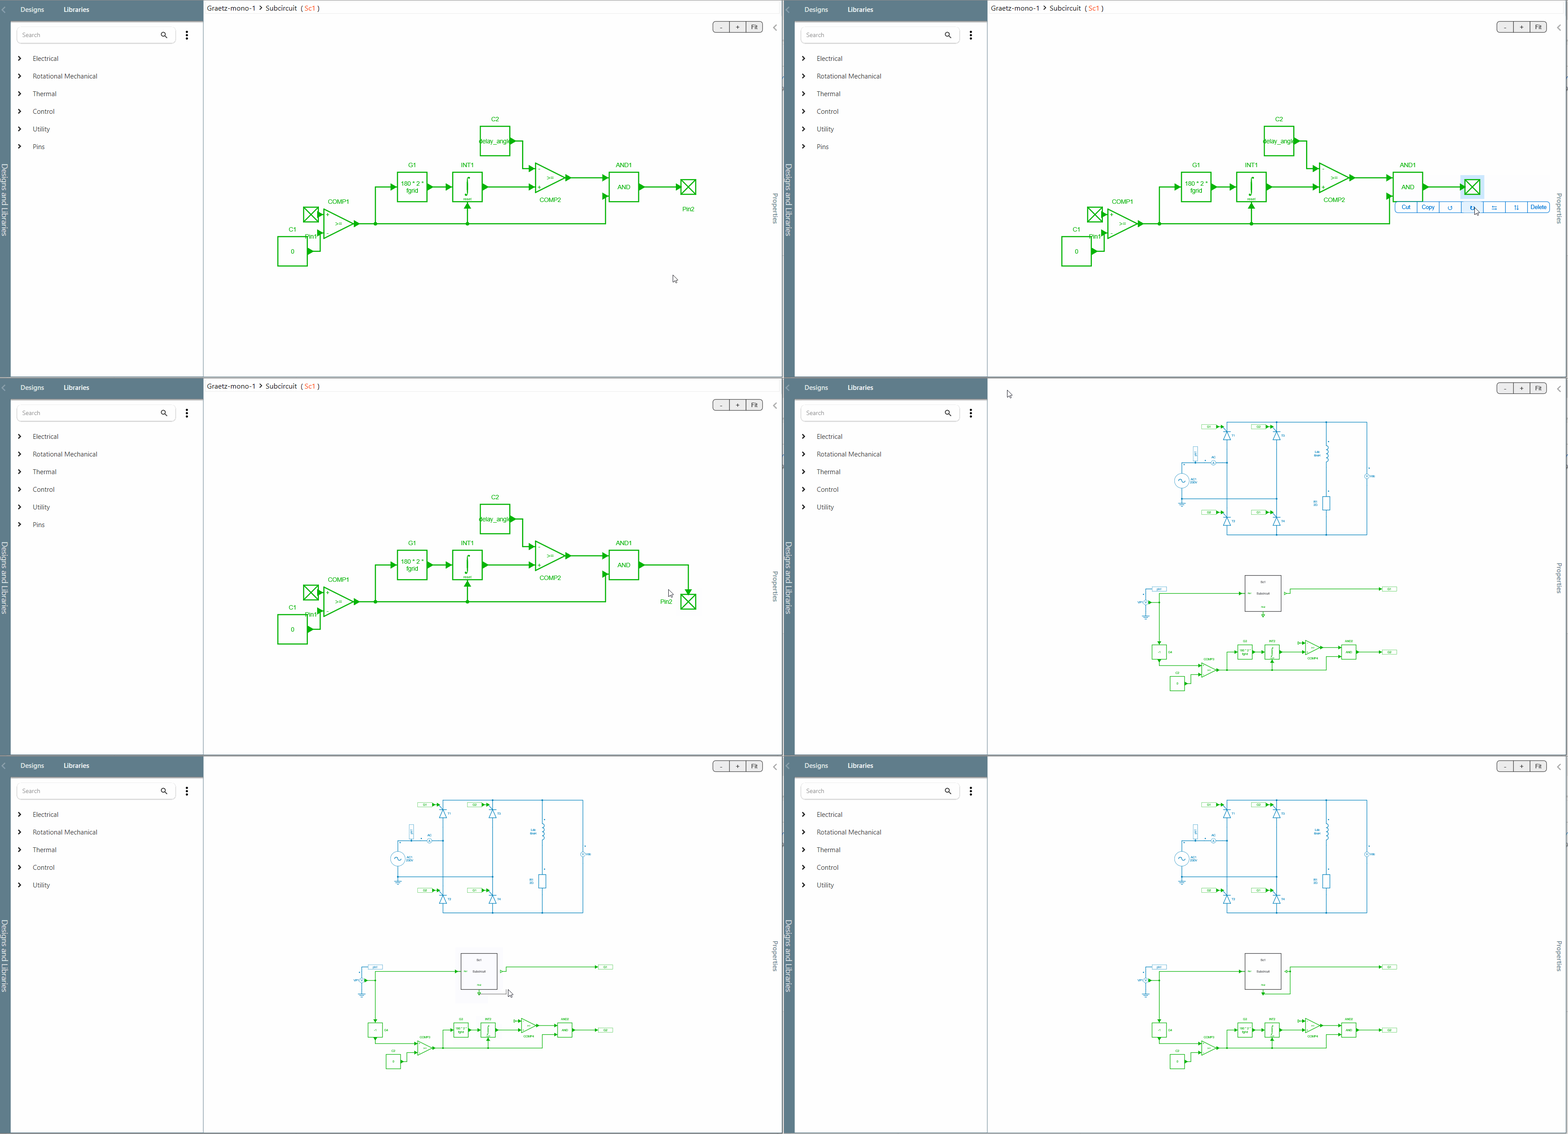
✔ Step 3: If you rotate an input or output pin, it automatically changes the direction of connection in the upper main circuit, as shown below.
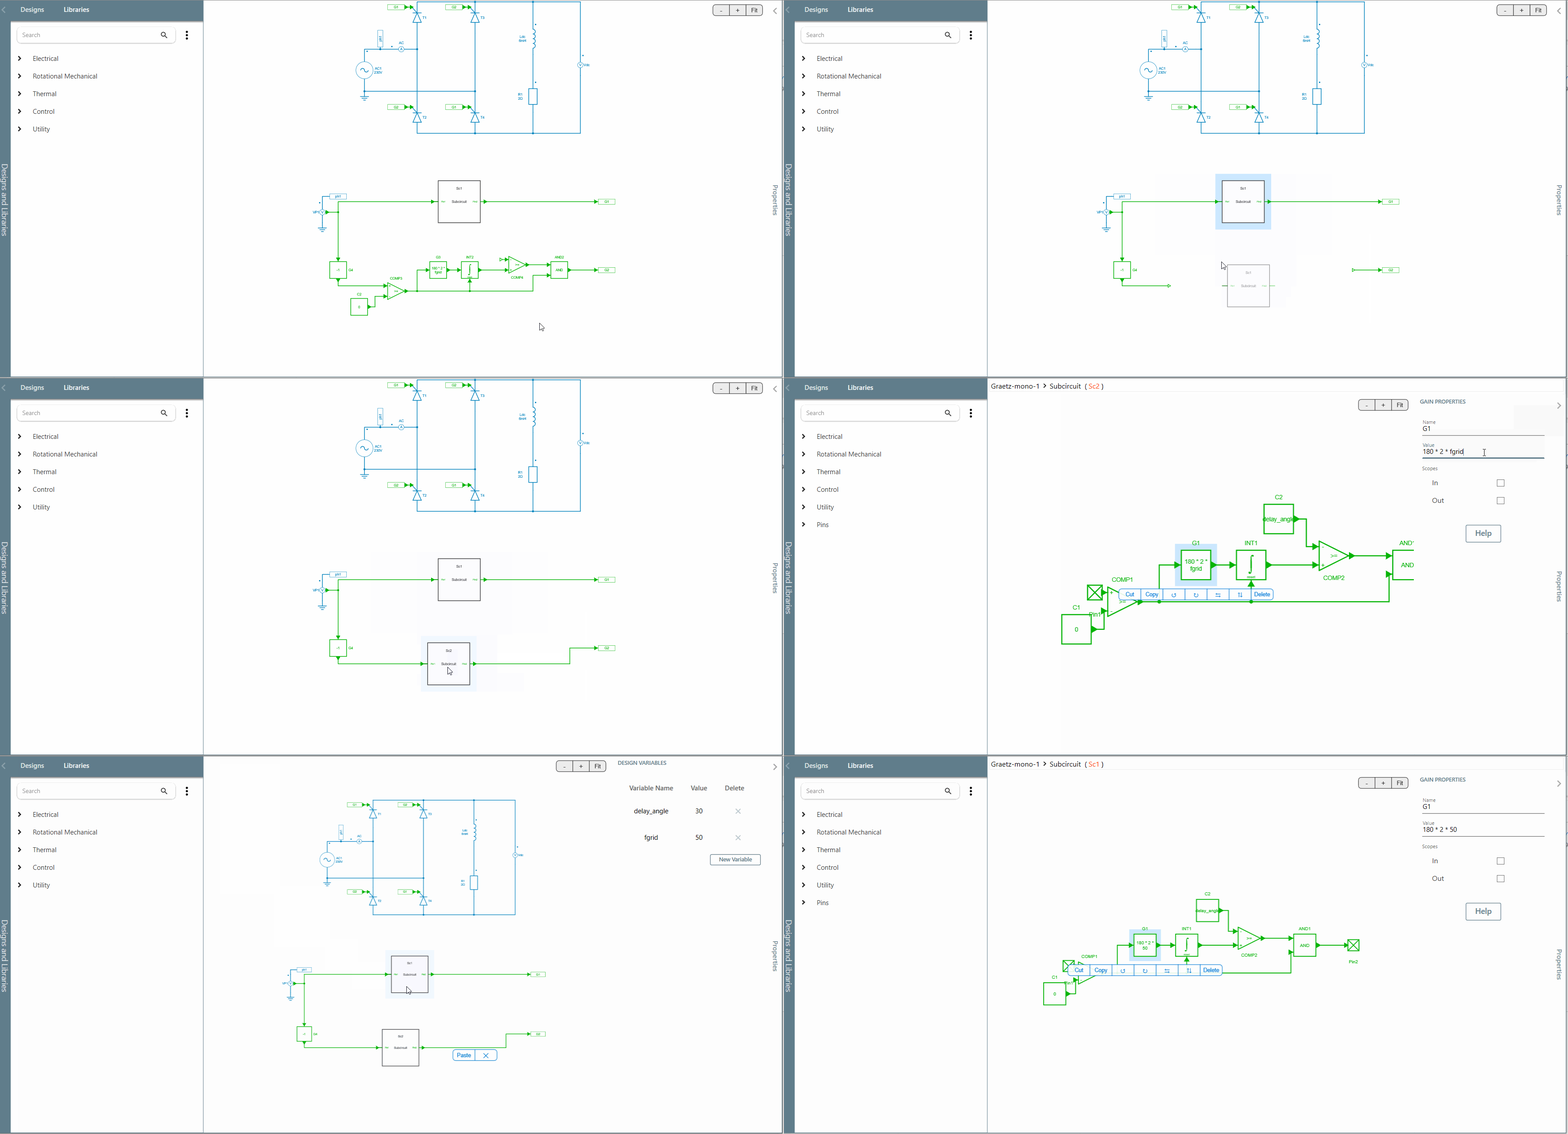
✔ Step 4: This subcircuit can now be copied and pasted to be used for the second leg of the rectifier.
Warning: Note that if a subcircuit is modified, this modification will automatically be applied for all copies in your schematic.
How to add a subcircuit to the custom library
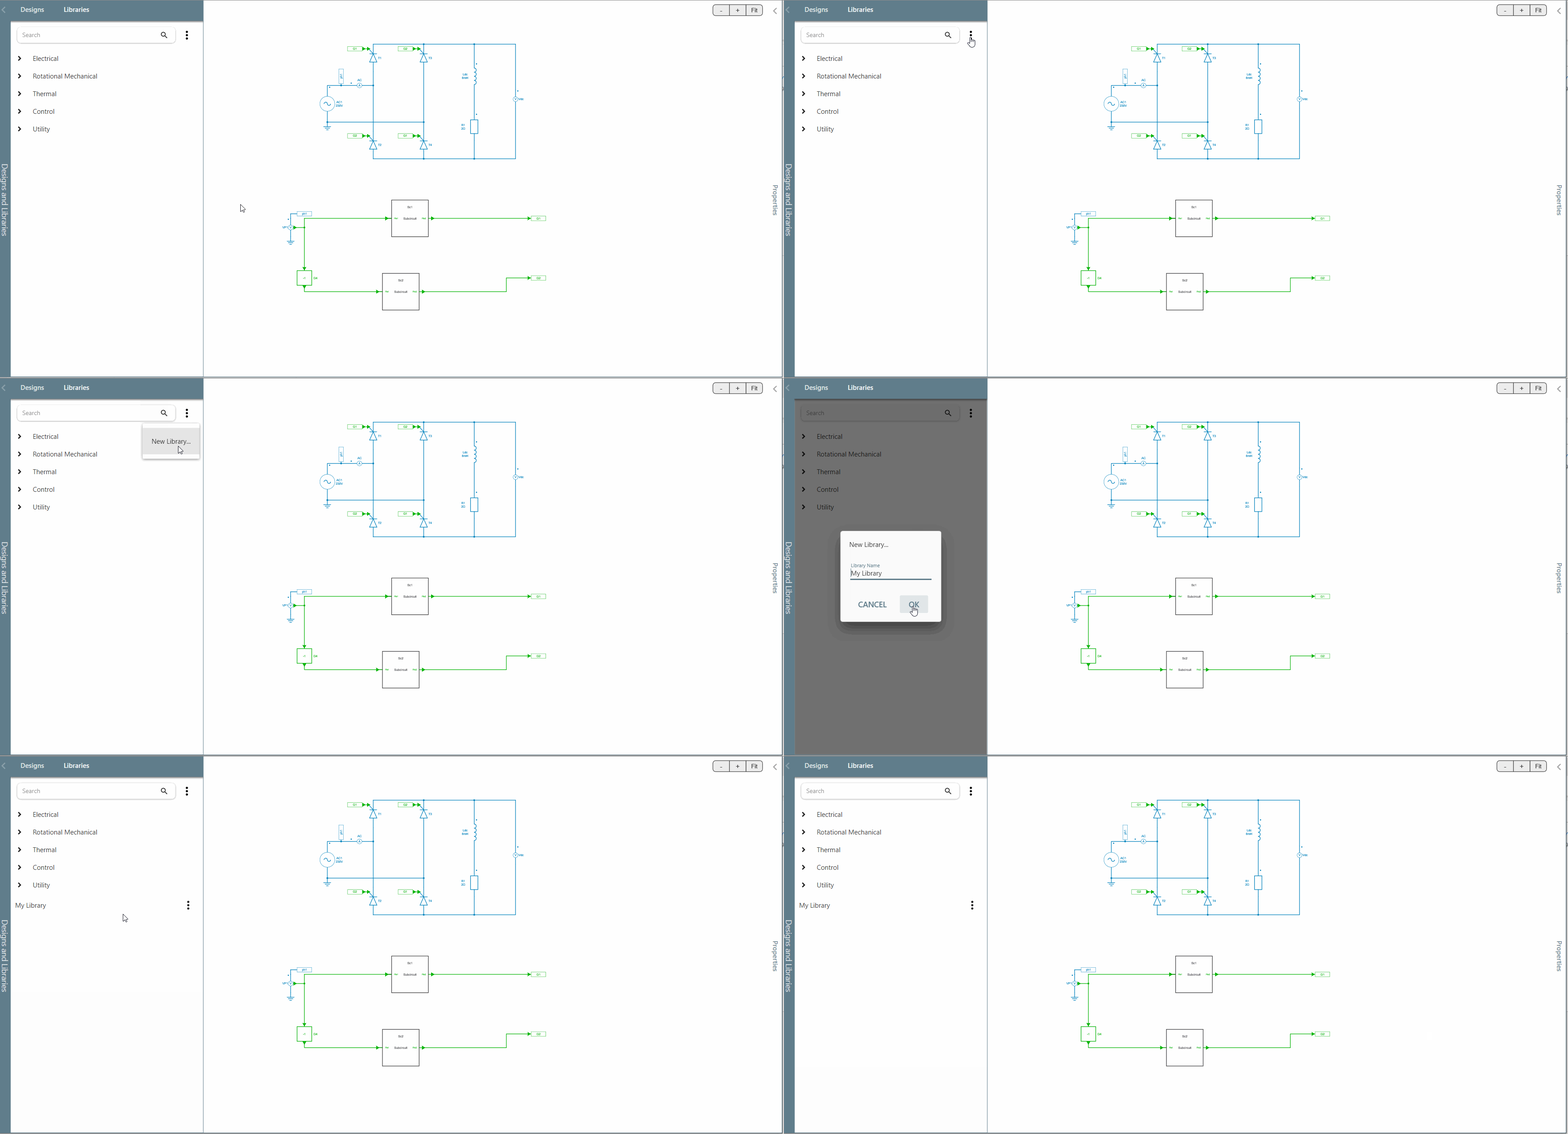
✔ Step 5: To go further, this subcircuit can be added to a custom library. Start by creating your custom library.
✔ Step 6: To add a subcircuit to this new custom library:
- click on "new subsystem", choose a name and prefix for your subcircuit,
- select the subcircuit you want to add,
- and choose the "from current selection" option for the initial content.
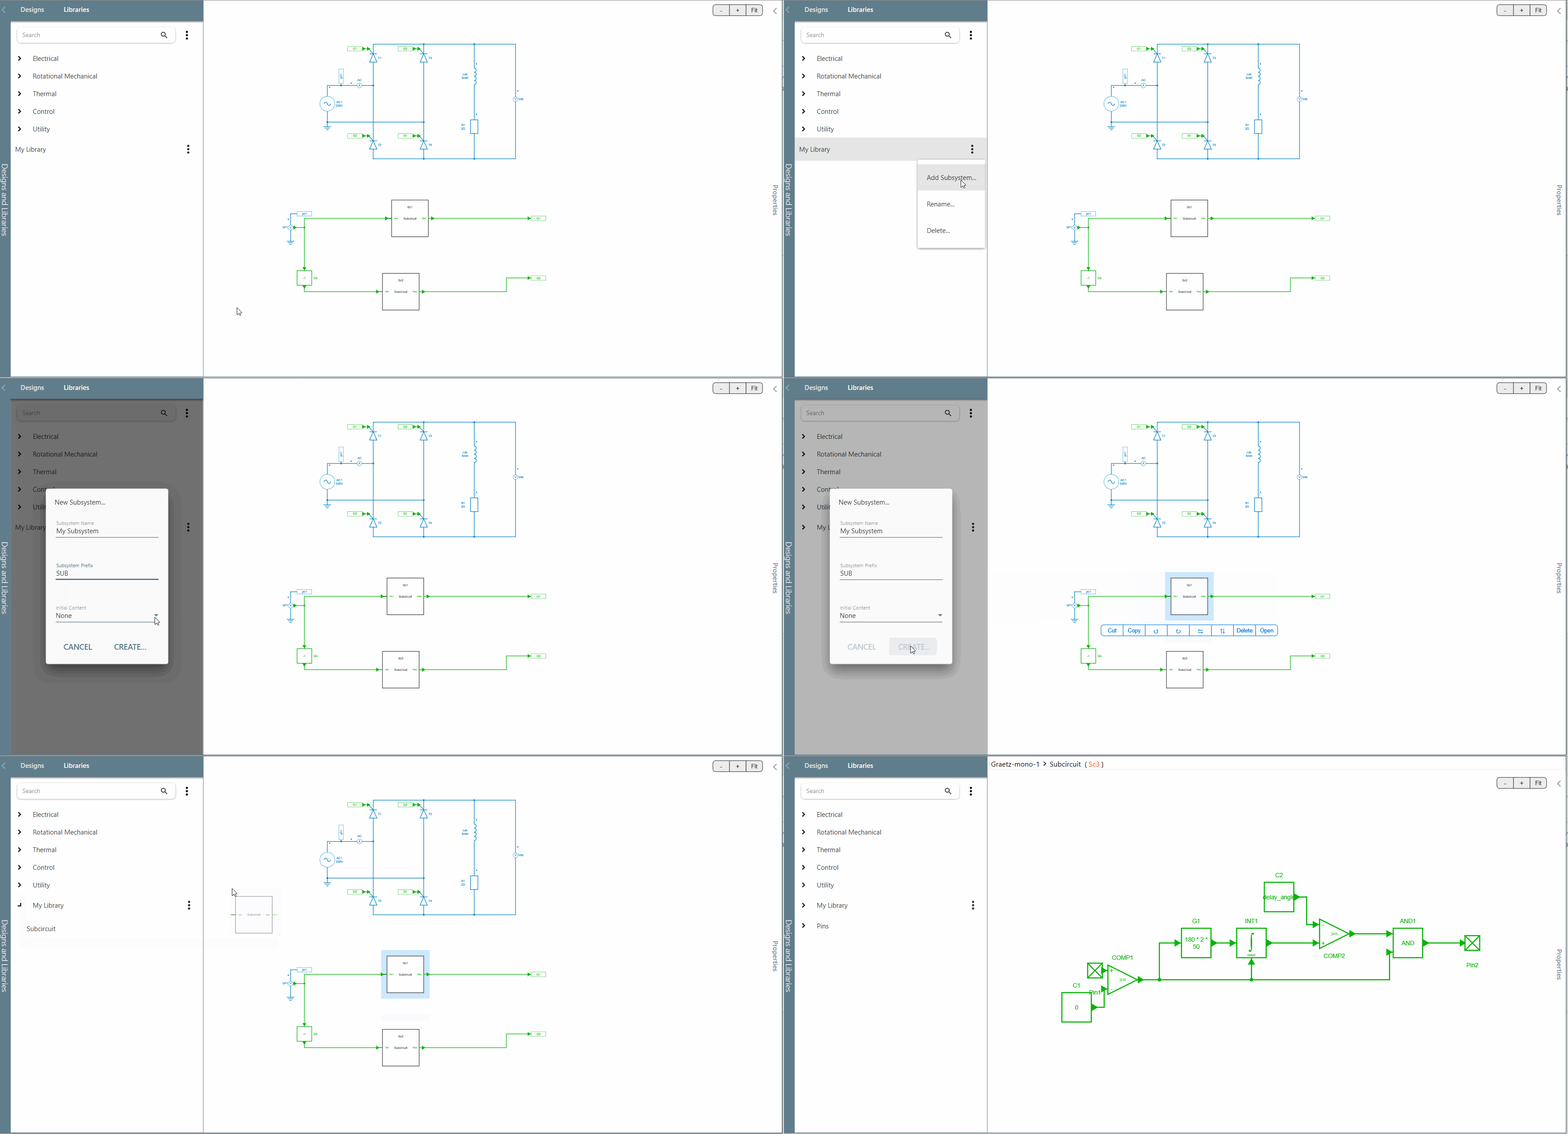
This component can now be used in all the designs of the project.
This concludes the introduction of subcircuit creation and custom libraries.