Using the Controlled PWM Generator Block
This tutorial explores the functionality of Simba's "controlled PWM generator" block.
This feature can help you to:
- create your own PWM signal using any control input signal,
- create variable PWM signals.
How to use the controlled PWM signal generator block ?
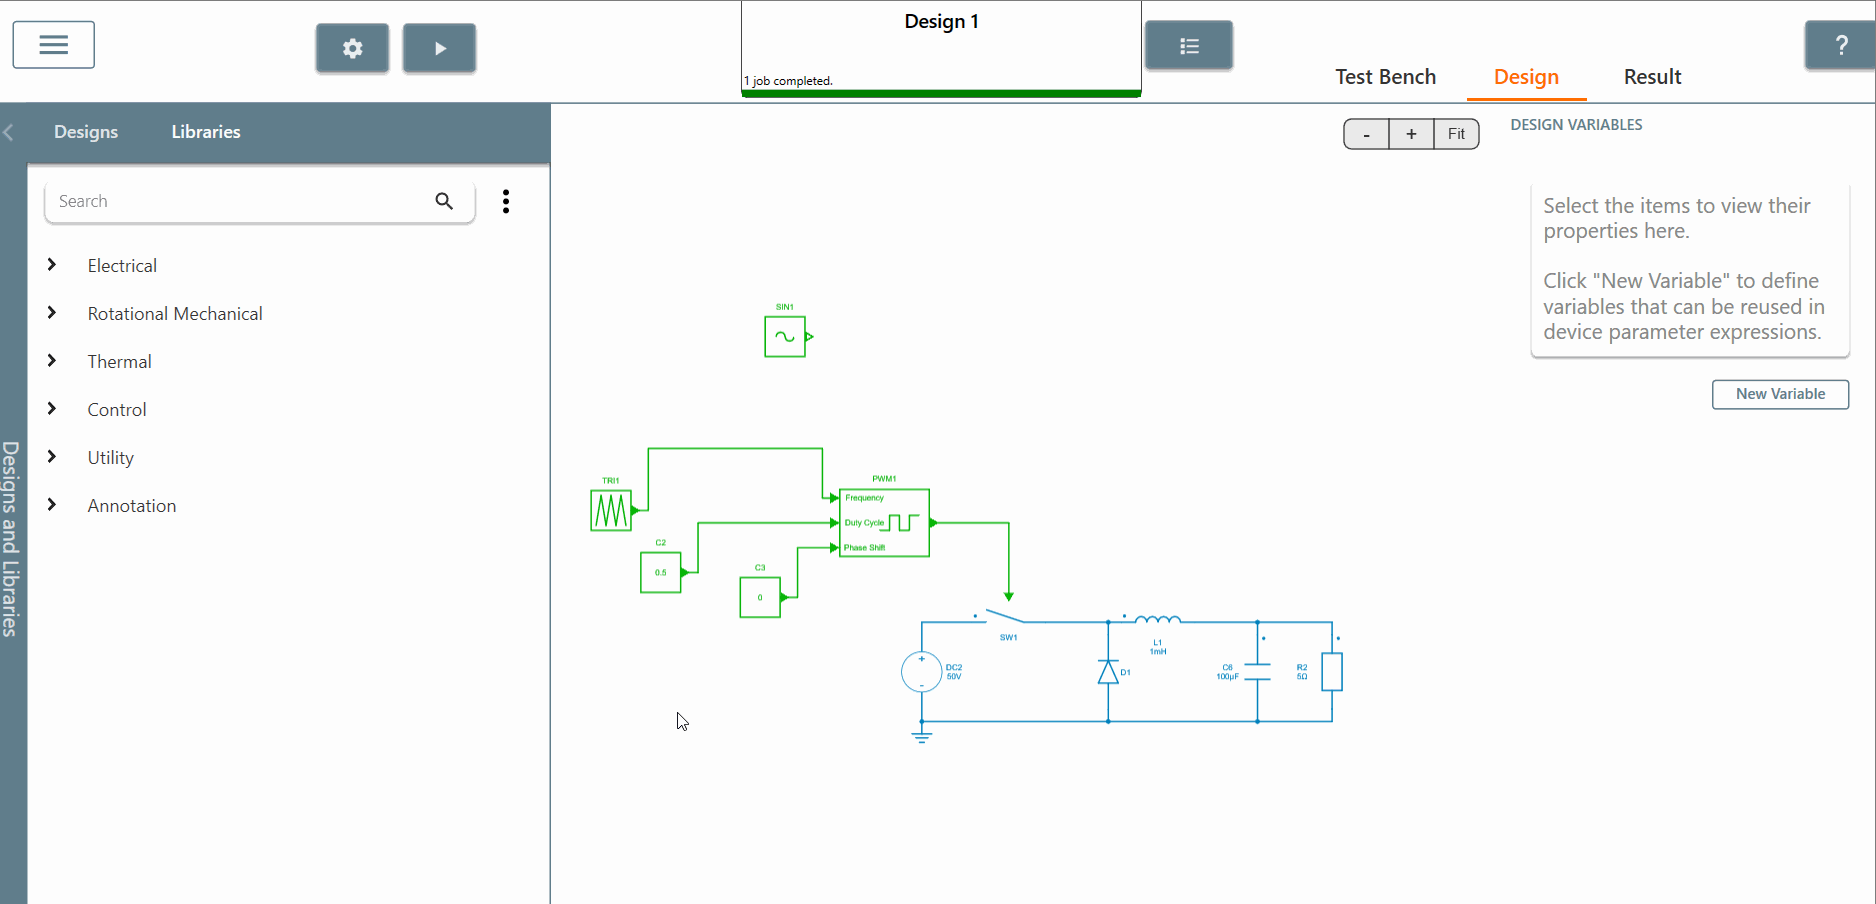
To describe this functionality, we consider the example of "PWM_controlled _block" circuit.
✔ Step 1: First, we will configure the "Transient Analysis Settings" from the "wheel" icon.

If you click on the icon, you will see:
- Solver type: Keep "Predictive time step"
- Time step: keep "1E-06
- End time: set it to "0.1s
✔ Step 2: Next, we will build the circuit to create a controlled PWM signal.
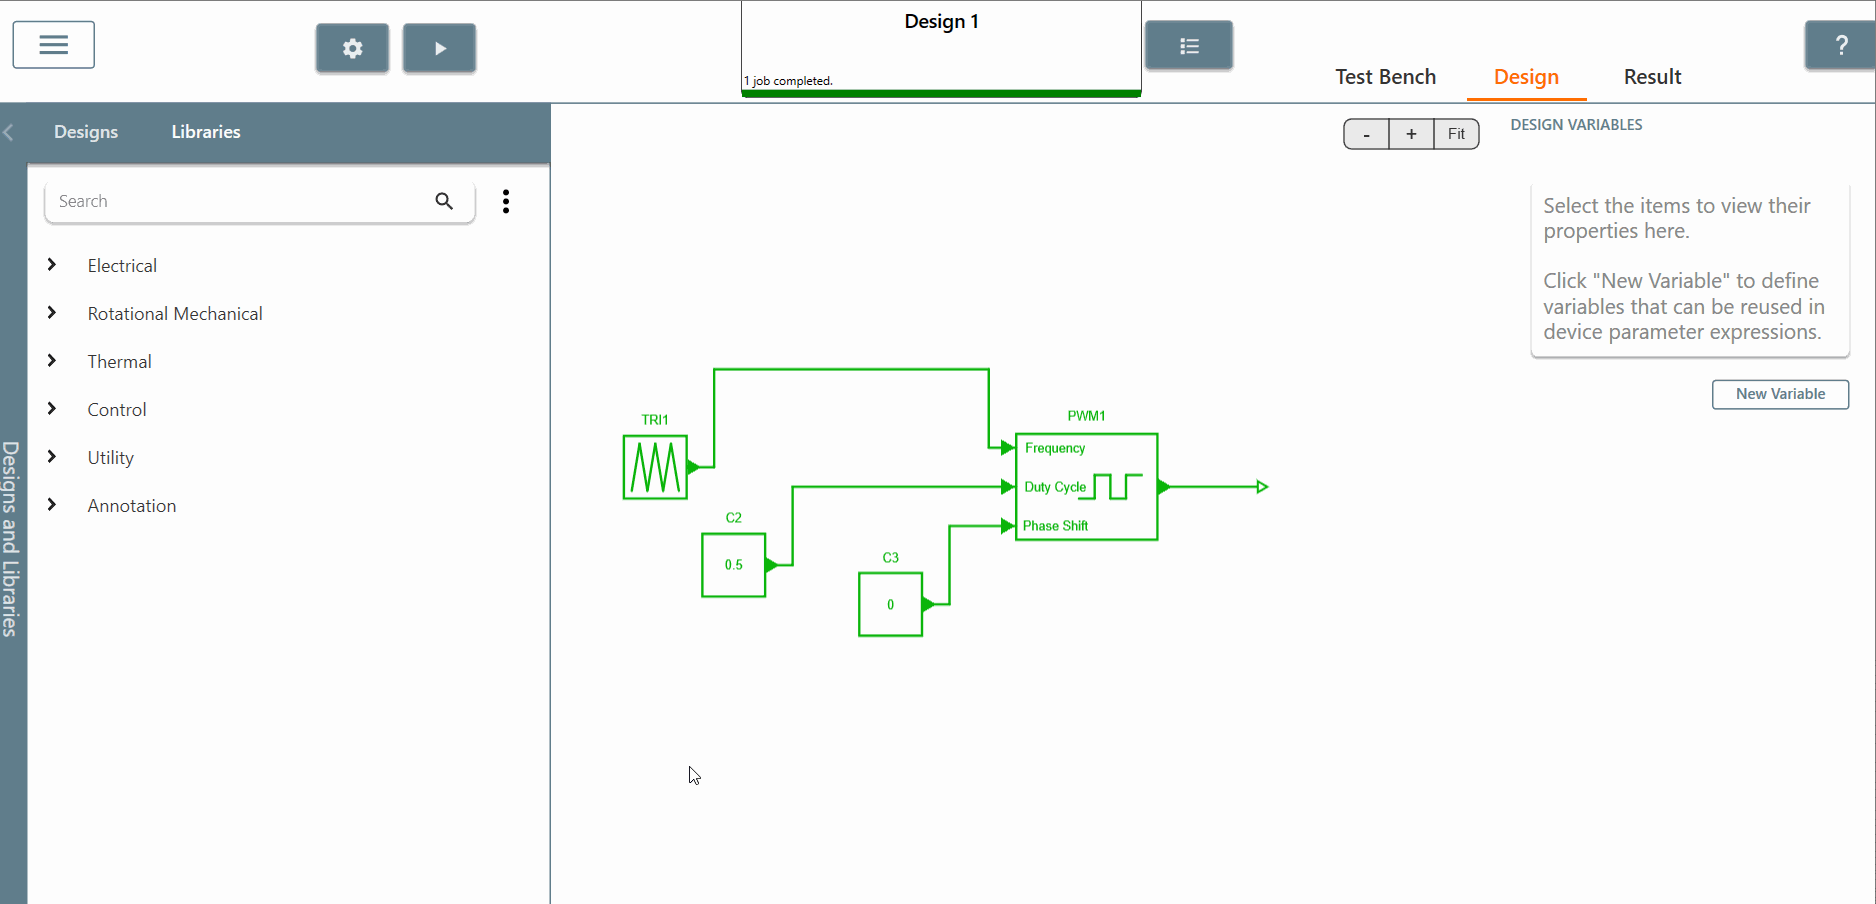
✔ Step 2.a: Choose the "controlled PWM generator" block in the library and set the rise time and fall time to 10u to get a more realistic behavior of the PWM signal. Also check the box for each scope to view all results.

✔ Step 2.b: Choose the "constant" block in the library and set its value to 0.5. Then connect this block to the input pin of the "controlled PWM generator" duty cycle. For this example, the duty cycle will be equal to 0.5.

✔ Step 2.c : Choose the "constant" block of the library and set its value to 0. Then connect this block to the phase shift input pin of the "controlled PWM generator". For this example, the phase shift will be equal to 0.
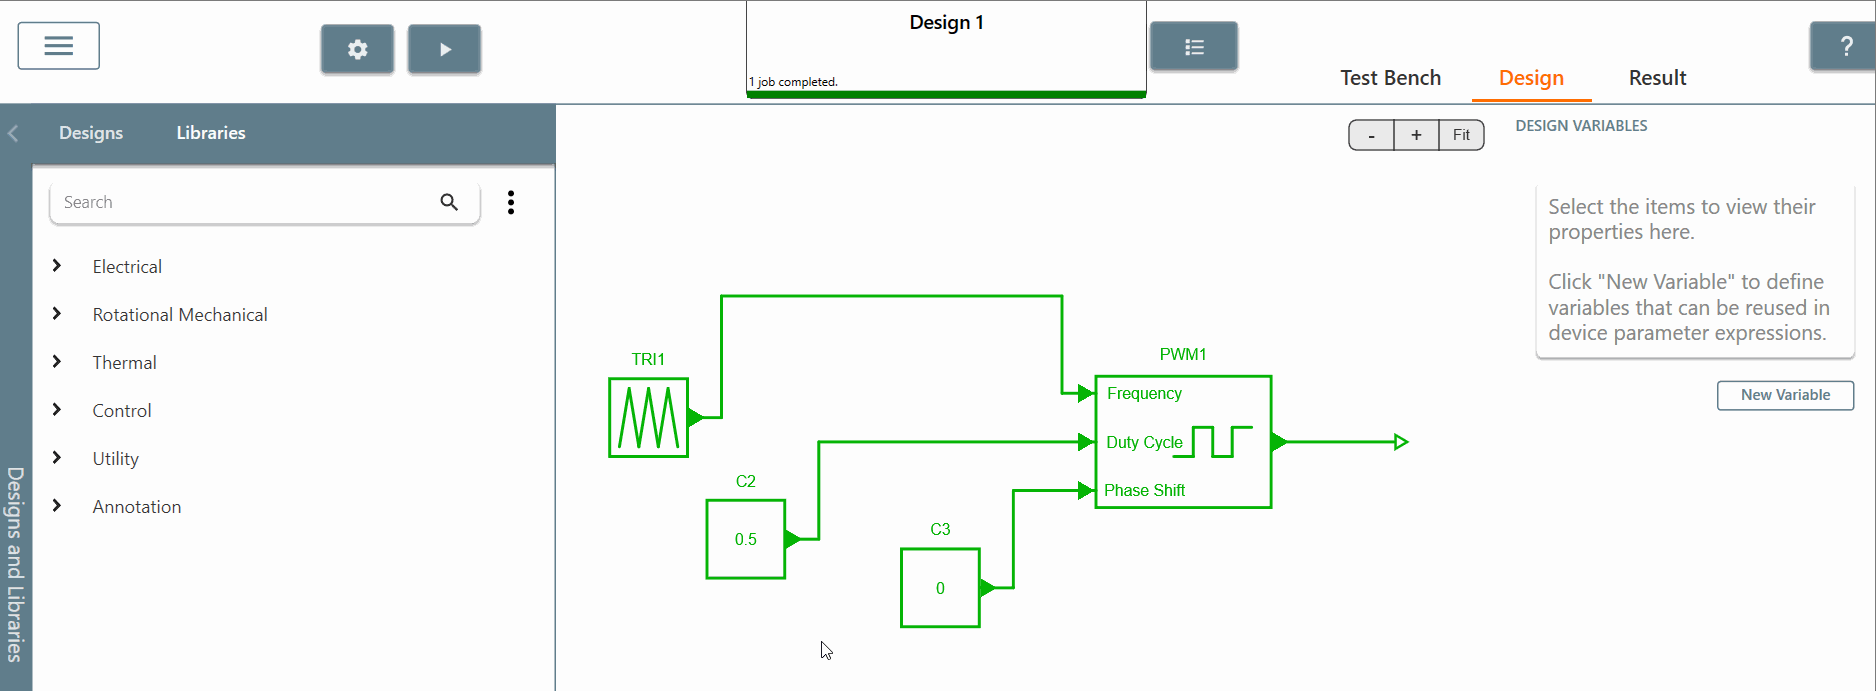
✔ Step 2.d: Choose the "triangle wave" block in the library and set :
- amplitude equal to 50
- the duty cycle equal to 0.5
- the frequency equal to 25 Hz
- the offset equal to 50
- the phase shift equal to 0
Then connect this block to the "frequency" input pin of the "controlled PWM generator". In this example, the frequency value of the "controlled PWM signal" will have an amplitude of 50 (Hz) with an offset of 50 (Hz) as well.

✔ Step 2.e: After running the simulation, we can now display:
-
the output of the "controlled PWM signal",
-
the frequency input signal of the "controlled PWM signal".
The PWM output signal is controlled by three input signals that are updated at the beginning of each new period, which leads to the following operation as shown in picture below:
- at the beginning of the simulation, as the frequency signal is equal to 50 Hz the PWM period will then be equal to 0.02s with a duty cycle of 0.5;
- then, when the second PWM period starts, the frequency signal is equal to 100 Hz, so the total time of the PWM period is equal to 0.01s with a duty cycle still equal to 0.5.
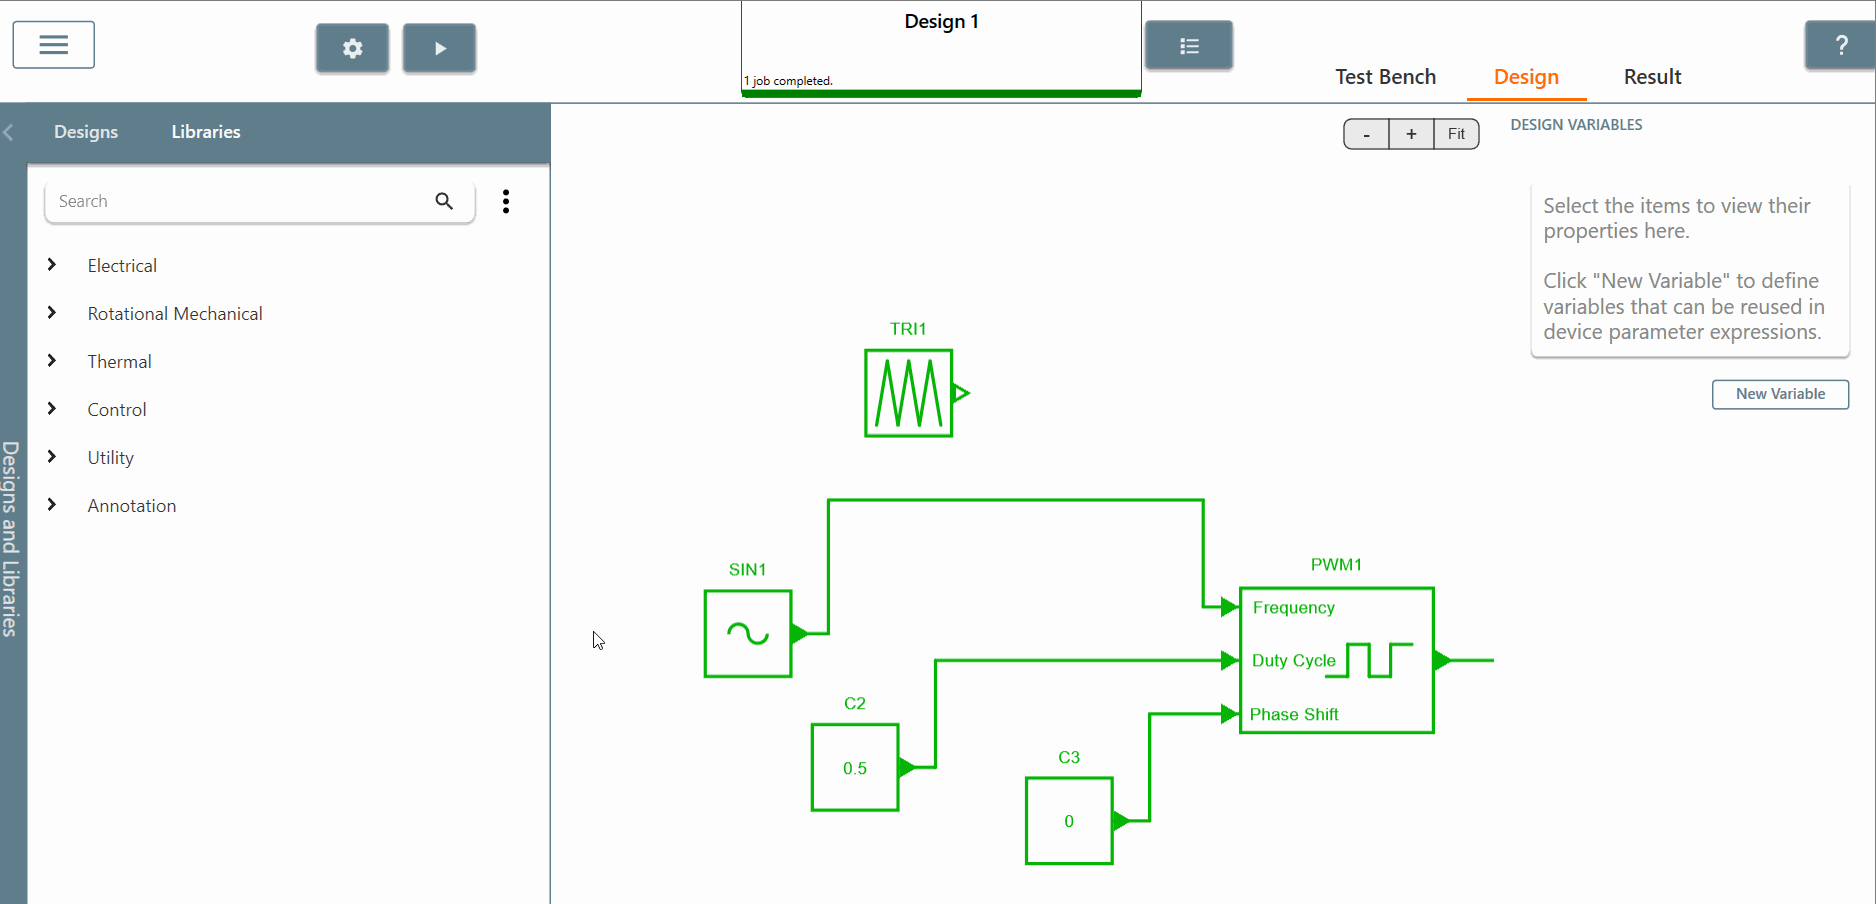
✔ Step 2.f: We can also replace "triangle wave" by "sine wave" and try to simulate with: :
-
end time equal to 0.3
-
amplitude of the sine wave equal to 1
-
frequency equal to 50 Hz
-
an offset equal to 5
As shown in the picture below, it can be seen at the beginning of the simulation the frequency of the input signal is equal to 5 (Hz) and the period of the PWM is equal to 0.2s.
✔ Step 2.g: Now we can use this "controlled PWM generator" to turn on and off the switch of a buck converter circuit. The triangle offset should be set to 5000 and we can observe that the output voltage R2 is equal to 28V.
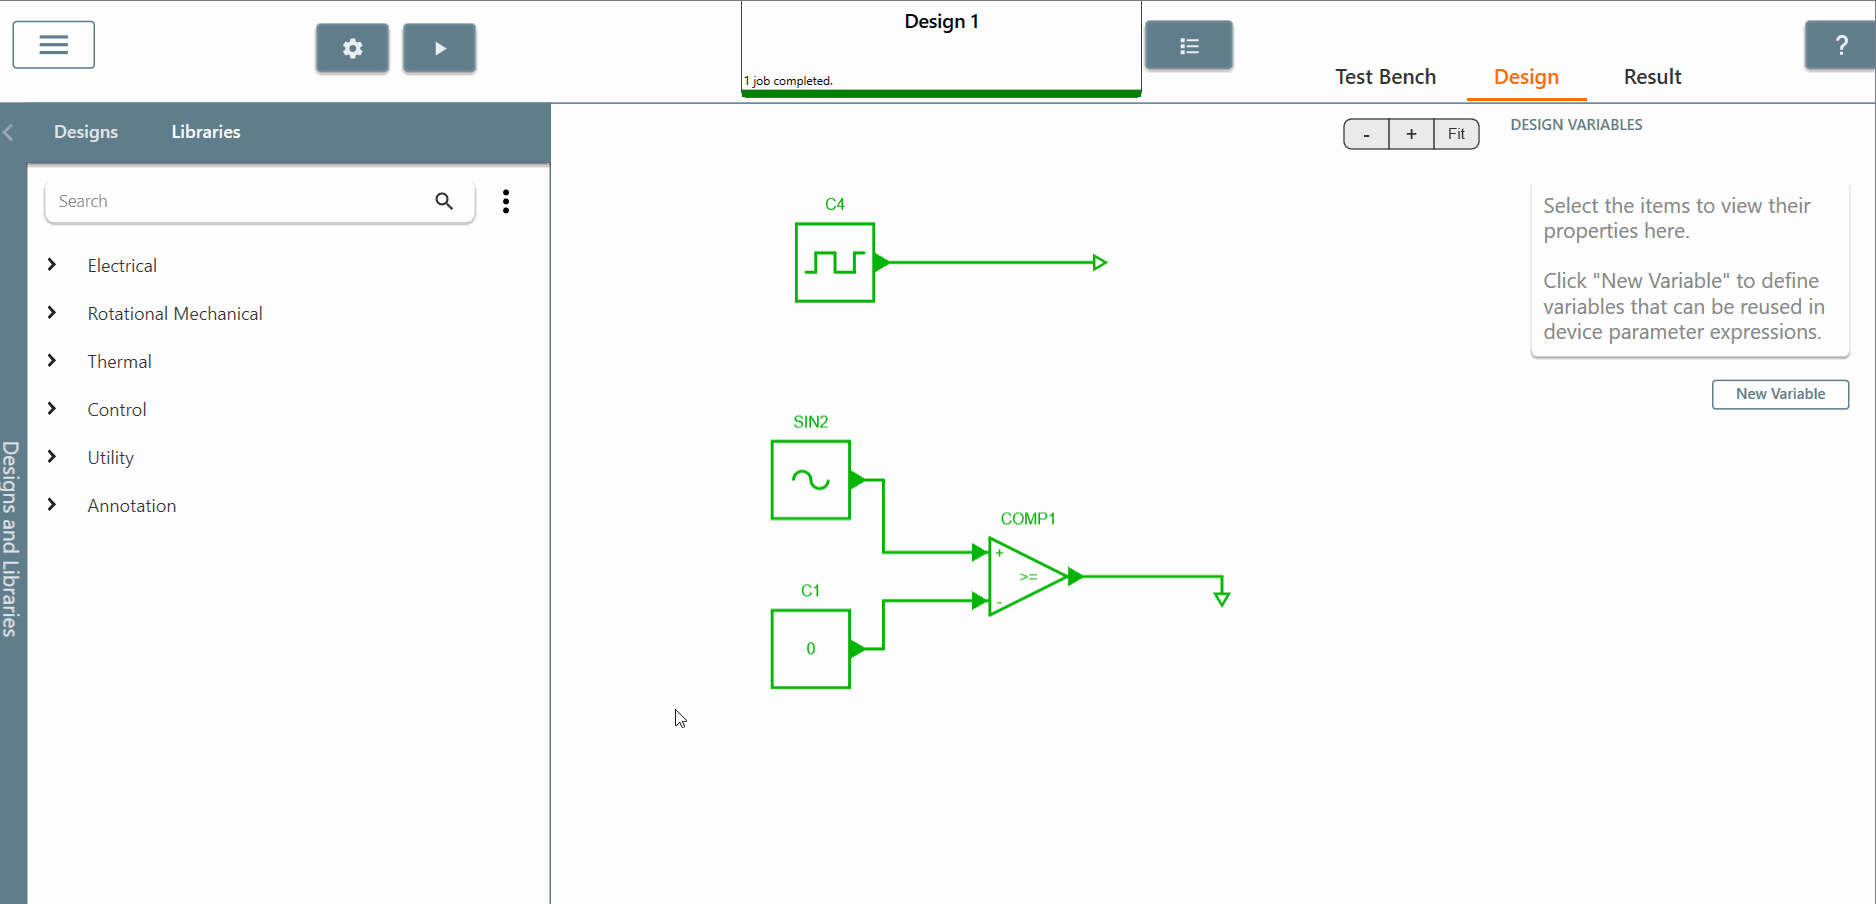
✔ Step 3 : Other PWM signals can be created using:
-
a "square wave" block ,
-
a comparator block with 2 inputs such as "constant" and "sinusoidal control source".
In the results tab, we can see the PWM signals created as well.
More information about the "Controlled PWM generator" can be found in Simba documentation here.
This concludes this tutorial on the functionality of SIMBA's "controlled PWM generator" block.
Important
It is important to keep in mind that the created PWM output signal is controlled by three input signals which are updated at the beginning of each new period.